Upcycling an Ivory Wedding Dress: From Ruching to Runway Ready


New sewing skills I learned with this dress:
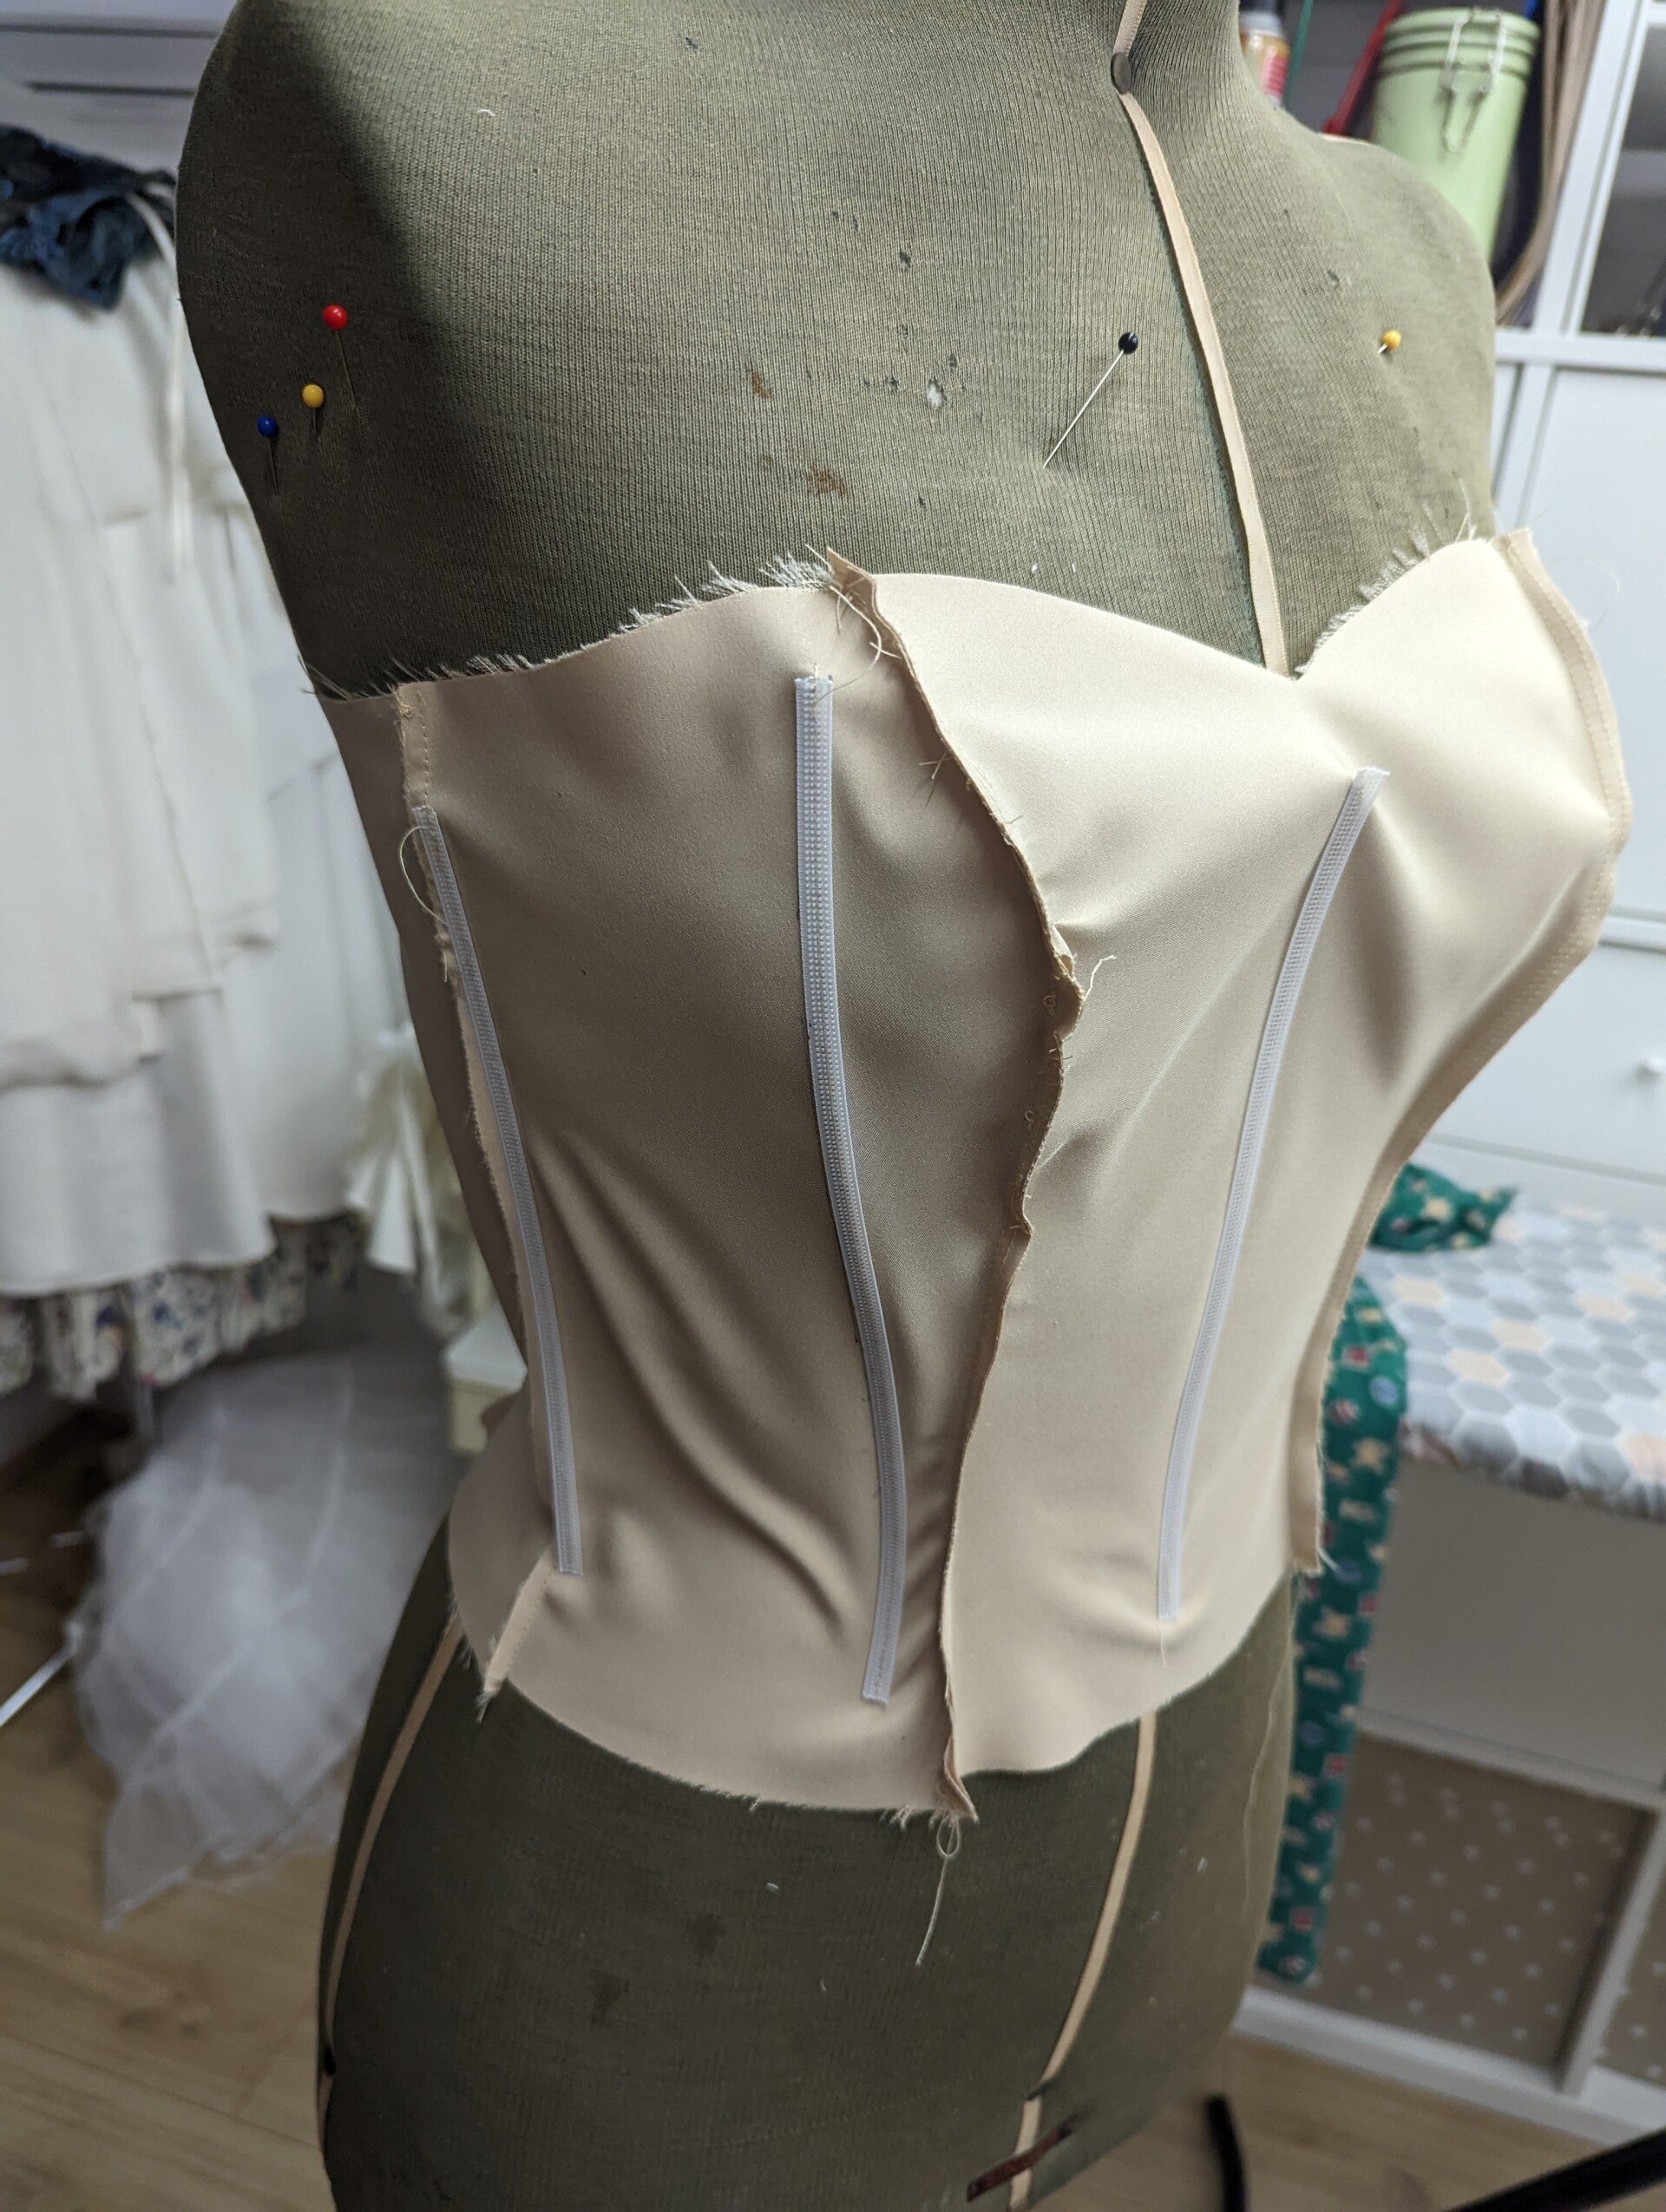
- Using sew in boning
- Changing a zipper back to a corset
- Deconstructing a wedding dress
- Cleaning a wedding dress
- Using upcycled lace
- Cutting a princess seamed bodice
- Adding eyelets to a garment
- Beginning to fit a garment to the dummy
- Reshaping skirt
Hey everyone! 🌟
I’m excited to share the journey of my first upcycling project—a strapless ivory wedding dress with ruching galore. This unbranded beauty, featuring a zipper back and delicate beaded detail, was given to me a few years ago by a woman who wanted it transformed, but not in its current wedding dress form.
Discovering the Dress
At the time, I didn’t know much about wedding dresses or how they were constructed. My love for them, however, fueled my curiosity. The goal of this project was to dive into the world of wedding dress construction and learn the ins and outs. After some contemplation, I decided to take apart the dress to see what I could create. To my surprise, the inside of a wedding dress wasn’t all that different from other garments—just with a bit more structure.
The Upcycling Process
-
Cleaning: The first step was washing the dress. Even though it was labeled as “dry clean only,” I decided to take a risk and washed it at 20 degrees Celsius with a non-bio stain remover. The dress came out sparkling clean, which set me up for the next phase—disassembly. I carefully took apart the bodice and skirt, discovering that the original dress used plastic sew-in boning. This was new to me, but it turned out to be quite manageable.
-
Reconstruction: Armed with a McCall's M4775 sewing pattern for a wedding dress bodice, I cut out a new bodice from the fabric of the original skirt. For the lace overlay, I repurposed an old pillowcase and duvet set I had lying around. Working with this lace was trickier than expected because, unlike some lace fabrics, it didn’t stretch. I had to cut it into different pieces and piece it together, which was a learning experience. Next time, I’d approach the lace differently, but I’m happy with how striking the final result turned out.
-
Lining and Skirt Redesign: I made a new bodice lining from an old gold bridesmaid dress I picked up from Vinted for just £1. It had been on sale for a while, so cutting it up didn’t bother me. The original A-line skirt was too bulky for my taste, so I decided to streamline it. I turned the skirt inside out and adjusted the seams down the thigh section to create more of a fishtail/trumpet silhouette. This was a massive learning curve for me, as I had no experience fitting garments to a person or mannequin. I ended up with a lot of leftover fabric, which I used to create heavy pleats for added movement.
The Final Touches
Despite making mistakes along the way, I’m thrilled with the outcome. The dress was one of the stars at a recent fashion show I participated in, and it looked absolutely stunning on the model. The movement and fit were just as I had envisioned.
This project taught me so much about wedding dress construction and fitting, and I’m excited to take on more upcycling challenges in the future!
Thanks for joining me on this journey. If you have any upcycling projects or tips, I’d love to hear about them!
Happy sewing! ✨👗


Add comment
Comments